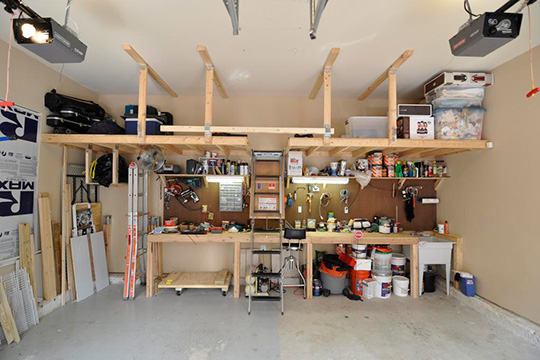
Garages often harbor a not-so-secret second life: heroic home workshop. They’re well-suited to the task, with a tolerance for the noise and dust of do-it-yourself projects.
You can assemble a basic workbench, cabinets, shelving, and add simple overhead lighting for less than $500.
But if a garage workshop isn’t comfortable and convenient to use, you’ll avoid projects rather than enjoy them.
Here are the essentials:
Get (or Build) a Solid Workbench
Your primary work surface should be a rock-solid bench with a hard and heavy top. Buy or build the best you can manage. (Then vow to keep the top clear — tools and materials have a way of eating up workbench space).
Premade workbenches run $100 to $500 and come in many lengths; they’re usually 24 inches deep. A 38-inch height is typical, but you might be more comfortable with a work surface as low as 36 or as high as 42 inches. Some benches include vises, drawers, and shelves.
Build one yourself using readily available plans. A simple, sturdy workbench takes less than a day to build and materials cost less than $100. The Family Handyman magazine offers detailed instructions for several, including an inexpensive, simple bench. A more complex bench with a miter saw stand and drawers costs $300-$500 to build and takes a weekend.
Install Bright Light
Garage work surfaces need bright ambient light and strong task lighting.
- High-intensity lights (halogen, LEDs, and others) are great for over-bench task lighting. An LED task light with a flexible goose-neck ($75-$150) puts light where you need it.
- If your garage has a finished ceiling, recessed fixtures (can lights) are inexpensive ($10-$20) and are good for task and ambient lighting.
- Ceiling-mounted fluorescent light fixtures are the classic, low-cost solution for workshop lighting. A two- or four-bulb, 48-inch fluorescent fixture costs less than $50.
When shopping for workshop lighting, think lumens rather than watts. A lumen is a measure of lighting brightness, and is a handy way to compare today’s new energy-efficient light bulbs. Lighting fixtures and bulbs have labels that indicate lumens per device. A general rule of thumb is to use 130 to 150 lumens per square foot of work space.
For example, a 40-watt fluorescent bulb puts out about 2,200 lumens. A 60-watt incandescent bulb puts out about 800 lumens.
Be Sure to Have Adequate Electrical Power
Along with your new lights, be sure your garage workshop has adequate electrical service — outlets and capacity — to accommodate your arsenal of power tools. Place outlets nearby; don’t depend on extension cords stretched across your garage — they can be a tripping hazard. If you don’t have 30-amp circuits on your garage service, talk with an electrical contractor about making this simple upgrade.
Ballpark $75-$100 an hour for an electrical contractor, plus a probable service-call fee of $50 to $100. Rates will vary across regions of the country.
Good electricians work quickly, so installing shop lights might take only an hour or two if access to electrical service is readily available. Increasing circuit capacity generally requires running new, heavier-gauge wire from your circuit-breaker box to the shop site.
Create Smart Storage
Don’t make yourself rummage through old coffee cans full of rattling bolts and bits: Visit home improvement centers for garage storage ideas and products.
Modular, wall-mounted garage storage systems let you configure shelves, bins, and hooks the way you need. Cost is about $10 per sq. ft. of wall space.
Plastic bins and hefty tubs protect tools, sandpaper, and tool manuals from insects, rodents, and dust. A 10-gallon plastic tub with lid is $5-$8.
Old kitchen cabinets, available where salvaged building materials are sold, are a great way to add storage — and a homemade workbench. Salvaged cabinets are about 50-75% cheaper than new. Top a run of cabinets with ¾-inch plywood for a durable work surface.
Related:
